
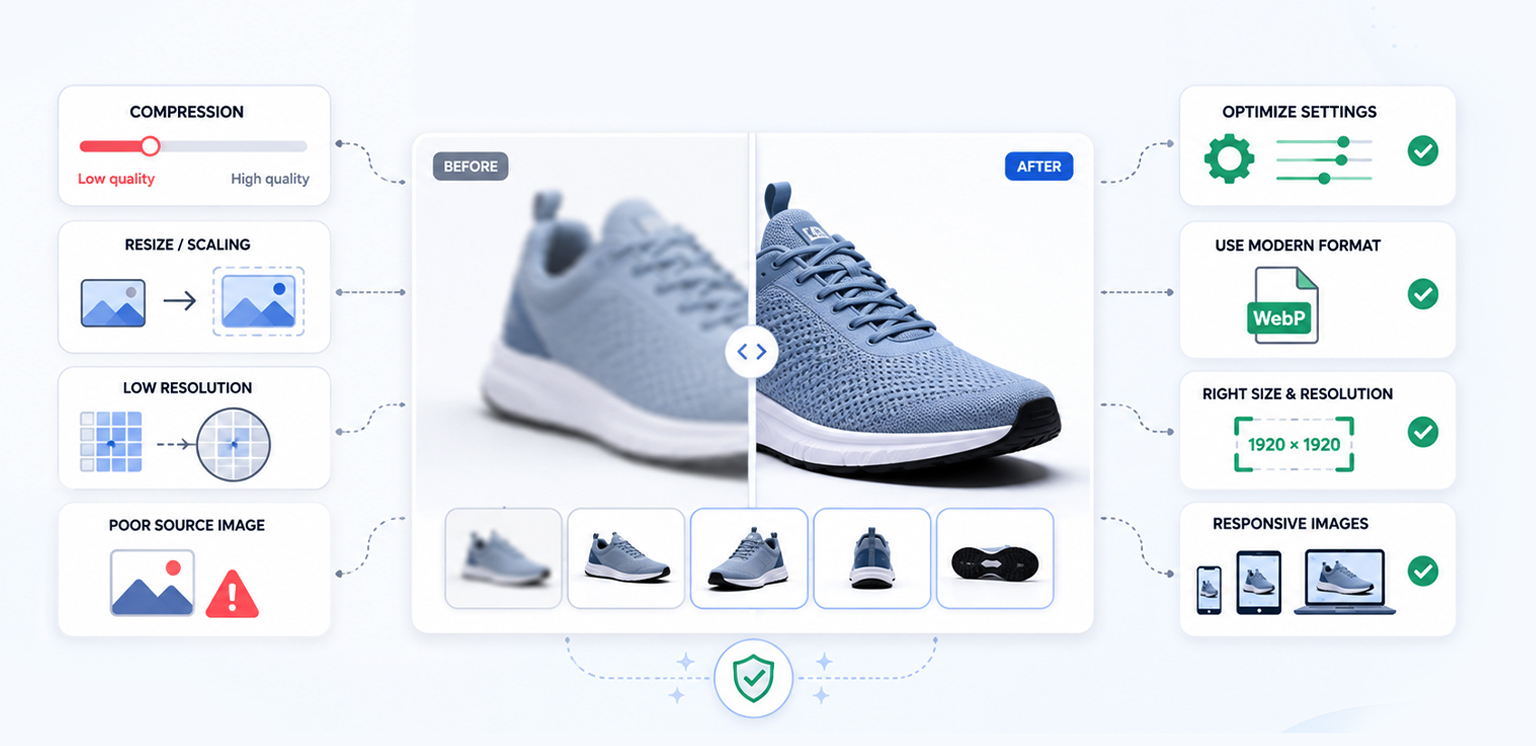
TL;DR: If your blurry product images after compression are affecting your store, the problem isn’t always compression itself. This article explains the most common causes and practical fixes to help you maintain sharp, high-quality product images without sacrificing page speed.
High-quality product images are essential for building trust, showcasing product details, and encouraging purchases. At the same time, image compression plays a critical role in improving page speed and delivering a better shopping experience.
However, many store owners notice that their product images appear blurry after optimization and assume compression is to blame. In reality, image softness is often caused by factors such as aggressive compression settings, scaling, or incorrect image dimensions rather than the compression process itself.
This article explores the most common reasons behind blurry product images after compression, explains how each issue affects ecommerce image quality, and outlines practical ways to maintain sharp, professional-looking product photos without creating unnecessarily large image files.
Quick Comparison: Common Causes and Their Fixes
Before diving into each cause, here’s a quick comparison of the most common reasons product images look blurry after compression and the best way to fix them.
| Cause | Visible Symptoms | Recommended Fix |
|---|---|---|
| Compression too aggressive | Loss of detail | Use moderate compression |
| Recompressing images | Gradual quality loss | Compress the original image |
| Image enlarged beyond its resolution | Blurry or pixelated | Use larger source images |
| Excessive sharpening | Harsh edges or halos | Reduce sharpening |
| Wrong compression method | Blurry text or graphics | Choose the right format |
| WebP quality settings | Soft-looking images | Increase WebP quality |
| Responsive image issues | Blur on some devices | Configure responsive images |
| Browser or CSS scaling | Stretched appearance | Display at the correct size |
| Poor source images | Blurry after compression | Start with high-quality images |
| Over-optimization tools | Unexpected quality loss | Review optimization settings |
Why Compression Doesn’t Always Cause Blurry Images
One of the biggest misconceptions is that every compressed image must lose noticeable quality.
In reality, modern image optimization uses advanced compression algorithms that reduce less noticeable visual information while preserving the details that matter most to the human eye. Formats such as WebP and AVIF achieve significantly better compression efficiency than older formats like JPEG because they use more advanced encoding techniques.
Google’s WebP documentation notes that WebP images can often achieve substantially smaller file sizes than comparable JPEG images at similar visual quality. Likewise, Google recommends balancing compression levels rather than simply choosing the smallest possible file size.
In other words, image compression without losing quality is absolutely achievable, but only when compression settings are appropriate for the image and its intended display size.
When compressed images look blurry, the root cause usually lies elsewhere.
10 Common Reasons Product Images Look Blurry After Compression
If your compressed product images appear blurry, the problem isn’t always the compression process. Below are the most common reasons and how to fix each one.
Compression Is Too Aggressive
Compression helps reduce file size, but pushing quality settings too low can remove fine textures, soften edges, and introduce visible compression artifacts. This often leads to blurry product images after compression, even though the image dimensions remain unchanged. Modern formats like JPEG and WebP use lossy compression, so finding the right balance between performance and visual quality is essential.
How to Fix It
- Use moderate compression levels instead of targeting the smallest possible file size.
- Compare the compressed image against the original before publishing.
- Prioritize visual quality for primary product images where details influence purchase decisions.
You’re Compressing an Already Compressed Image
Every time a lossy image is compressed again, additional image data is discarded. Repeated compression gradually reduces sharpness, increases artifacts, and contributes to noticeable image quality loss after compression. This commonly happens when previously optimized images are compressed by multiple editing tools, plugins, or content delivery services.
How to Fix It
- Keep an untouched master copy of every product image.
- Compress only the source file instead of an already compressed version.
- Avoid multiple optimization steps unless they’re carefully configured.
The Image Is Displayed Larger Than Its Actual Resolution
Compression is often blamed when the real issue is image scaling. If an image is displayed larger than its original pixel dimensions, browsers must enlarge it, making fine details appear soft or blurry. This is one of the most common image issues why compressed images look blurry, particularly on high-resolution displays.
How to Fix It
- Upload images that match or exceed their largest display size.
- Consider high-density displays when determining image dimensions.
- Avoid relying on browser upscaling to fill larger image containers.
Excessive Sharpening Before Compression
Sharpening can improve perceived clarity, but applying too much before compression often creates halos and exaggerated edges. Compression algorithms may struggle to preserve these artificial details, resulting in images that appear less natural and sometimes blurrier than expected.
How to Fix It
- Apply sharpening conservatively during image editing.
- Preview the final compressed version before publishing.
- Use sharpening only when it genuinely improves visible detail.
Wrong Compression Method for the Image Type
Not every image benefits from the same compression approach. Photographic product images generally perform well with modern lossy formats, while logos, icons, screenshots, and graphics containing sharp edges often require lossless compression. Choosing the wrong method can reduce overall ecommerce image quality, especially around text and fine graphical elements.
How to Fix It
- Use lossy compression primarily for photographs.
- Choosing lossless formats when preserving crisp edges is more important than minimizing file size.
- Match the compression method to the content instead of applying one setting to every image.
Why Blurry WebP Images Aren’t Usually WebP’s Fault
Many store owners assume blurry WebP images are caused by the WebP format itself. In reality, WebP supports both lossy and lossless compression, and image quality depends largely on the selected encoding settings. Low-quality values or repeated optimization are far more likely to cause visible softness than the format itself.
How to Fix It
- Adjust WebP quality settings instead of abandoning the format.
- Generate WebP images directly from the original source file.
- Evaluate visual quality rather than judging the format by file size alone.
Responsive Image Issues
Responsive images improve loading performance by allowing browsers to select the most appropriate image size for each device and screen resolution. However, incorrect srcset or sizes configurations may cause browsers to download images that are smaller than needed, making blurry ecommerce product photos more noticeable on larger or high-density screens.
How to Fix It
- Verify that responsive image variants cover all intended display sizes.
- Ensure browsers can select appropriately sized images for different devices.
- Test product pages across desktop, tablet, and mobile displays.
Browser or CSS Scaling
Even a well-compressed image can appear blurry if CSS stretches it beyond its intended size. Fixed width and height values, scaling transforms, or oversized image containers force browsers to resample images, reducing apparent sharpness and affecting the overall shopping experience.
How to Fix It
- Display images close to their intrinsic dimensions whenever possible.
- Review CSS rules that stretch, enlarge, or transform product images beyond their intended display size.
- Test layouts across different screen sizes to identify scaling issues.
Poor Source Images
Compression cannot restore detail that isn’t present in the original image. If the source photo is already low resolution, slightly out of focus, or heavily edited, further product image compression may make those flaws more noticeable. Starting with a high-quality source is one of the most effective ways to maintain image quality after compression.
How to Fix It
- Use high-resolution original product photos whenever possible.
- Avoid editing or enlarging low-quality images before compression.
- Inspect source images carefully before adding them to your optimization workflow.
Over-Optimization Plugins and CDN Settings
Many ecommerce platforms automatically optimize images through plugins, themes, or content delivery networks (CDNs). While these tools improve performance, overly aggressive settings or multiple optimization layers can unintentionally reduce image quality. In some cases, an image may be compressed more than once before reaching the customer.
How to Fix It
- Review optimization settings provided by your CMS, plugin, or CDN.
- Avoid enabling multiple image optimization tools that perform the same task.
- Periodically compare live product images with the original files to detect unexpected quality loss.
Best Practices to Maintain Image Quality After Compression
The most successful ecommerce stores don’t aim for the smallest possible image files. Instead, they focus on achieving the best balance between performance and visual quality.
To maintain image quality after compression, consider these best practices:
- Always compress from the highest-quality original image.
- Choose modern formats such as WebP or AVIF where supported.
- Use responsive images instead of serving one large image to every device.
- Avoid repeated lossy compression throughout your editing workflow.
- Verify image quality visually rather than judging optimization solely by file size.
- Test images on desktop, mobile, and high-density displays before publishing.
- Regularly review automated optimization settings after plugin or CDN updates.
Following these practices helps reduce bandwidth without sacrificing the visual quality customers expect from an online store.
Conclusion
Blurry product images after compression are rarely caused by compression alone. In most cases, the issue stems from aggressive compression settings, repeated optimization, incorrect image sizing, scaling, or low-quality source files. By identifying the real cause instead of assuming the compression format is at fault, you can improve both visual quality and website performance.
Ultimately, maintaining excellent ecommerce image quality requires balancing compression with visual fidelity rather than simply producing the smallest possible image files.
Frequently Asked Questions
Why do product images look blurry after compression?
Can image compression reduce image quality?
How can I compress product images without making them blurry?
Why do my product images look blurry on mobile devices?
Why do product images look blurry after converting to WebP?
8 July, 2026
Leave a Comment
Ishan Makkar
He is a web performance specialist focused on image optimization and site speed. As the founder of Image Optimizer Pro, he helps businesses reduce image load times and improve Core Web Vitals. His work centers on delivering faster websites, better user experience, and measurable SEO gains without complex development.