TL;DR: Optimizing your Shopify images is key to keeping your store fast, user-friendly, and search engine–friendly. Large, unoptimized visuals can slow down your site, hurt SEO rankings, and increase bounce rates. This guide walks you through everything you need to know about Shopify image optimization – from choosing the right formats and sizes to compressing images, using alt text, enabling lazy loading, and automating the process with tools like Image Optimizer Pro. The goal is simple: make your store look great while keeping it fast and efficient across all devices.
Images bring your Shopify store to life, from high-quality product photos to collection banners and lifestyle visuals. However, the same images can slow down your site quietly, hurting your SEO, conversions, and user experience.
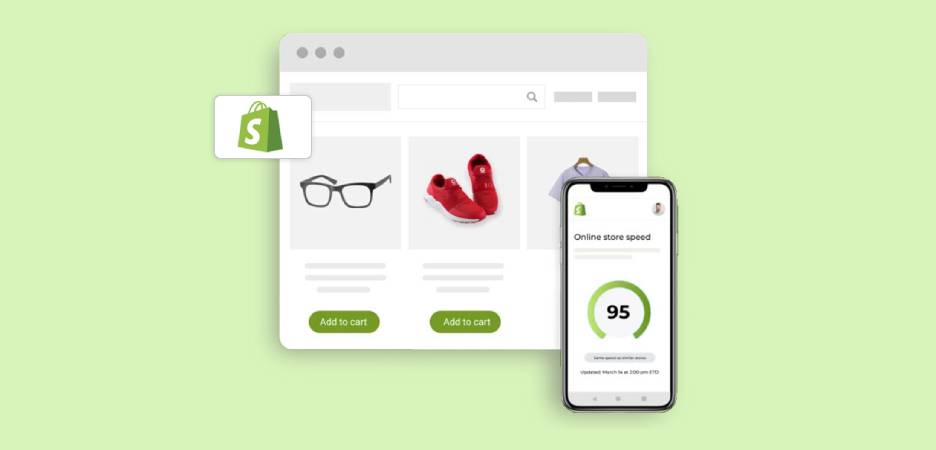
Images often constitute the bulk of a page’s weight. This means, without proper Shopify image optimization, even a small store can experience layout shifts, delayed pages, and higher bounce rates, especially on mobile.
In this guide, we’ll go step by step on how to optimize Shopify images, talk about Shopify store speed, and show you how it’s possible to make your visuals really work in your favor, not against you.
What is Image Optimization?
Image optimization is the process of reducing an image’s file size while keeping it sharp, clear, and visually appealing. In simple terms, it is about finding the right balance to make images lightweight, fast-loading, and compatible across all devices. For Shopify stores, this means making sure product photos, banners, and collection images do not slow down the shopping experience.
Optimized images are compressed to reduce load times, saved in the most suitable format like WebP, resized to fit Shopify’s layout properly, and enhanced with SEO-friendly elements such as alt text and descriptive file names. When done correctly, image optimization helps your Shopify store load faster, improves search engine crawl efficiency, and reduces bounce rates. All of these factors contribute to better rankings, user experience, and higher conversions.
Why Image Optimization Matters for Your Shopify Store

Whether you run a small Shopify store or manage a growing eCommerce brand, image optimization has a direct impact on your website’s speed, visibility, and conversions. Here’s why it matters:
- Faster Page Load Times: A site that loads quickly keeps customers engaged. If a page load time goes up by 1 to 3 seconds, bounce rate can rise by up to 32%. Optimized images weigh less, which helps to reduce server load plus improve page performance.
- Better SEO Rankings: Google considers page speed as a ranking factor. When the images on your store are too bulky, it can lower your visibility in search results.
- Improved User Experience: Faster pages, smoother layouts, and clear visuals improve the overall user experience, encouraging the shoppers to spend more time and purchase more.
Practical Steps to Optimize Your Shopify Store’s Images

Now, it’s time to get down to actionable things that you can implement to optimize Shopify images.
1. Compress Images Efficiently
Shopify automatically renders images in WebP format whenever possible, and handles thumbnail generation for product listings. This automatic optimization is, however, merely a baseline. It doesn’t deeply compress and fine-tune your Shopify store images for maximum performance.
Shopify’s upload limit is 20MB per image, although your files should preferably be kept to 70-100KB for faster rendering. Hitting that sweet spot ensures crisp visuals without compromising performance.
Option 1: Automatic Compression
Automatic compression is the simplest, fastest, and most reliable way to compress images on Shopify.
With Image Optimizer Pro, you can bulk compress all your existing store images, product shots, category images, banners, thumbnails, and blog visuals in one click. The app scans your media data, identifies unoptimized files, and applies smart Shopify image compression without any visible quality loss.
Simply install Image Optimizer Pro from the Shopify App Store, go to the “Optimize Images” section, and run the optimization. The app compresses your files automatically in the background, optimizing them for both desktop and mobile.

Option 2: Manual Compression
You can also choose to have more control over images with the manual compression feature within ImageOptimizerPro. With this option, you can fine-tune each image individually before publishing. You can –
- Adjust pixel dimensions
- Reduce file weight
- Refine sharpness
Typically, each product image is up to the desired visual quality and speed standards. Although manual compression offers precision, it can be time-consuming for large stores with hundreds of images.

2. Resize Images for Correct Display
Images that seem perfect might even slow down your store when it is too large in pixel dimensions. Shopify appears to show product images with size constraints (e.g., a 600x600px or 800x800px for collection pages). Uploading a 4000-pixel-wide image is a waste of bandwidth since Shopify continues to load at full resolution.
Here are the file sizes Shopify recommends for the main image types:
| Image Type | Recommended Dimensions | Recommended Size |
|---|---|---|
| Background Image | 2560 x 1400 | 20 MB |
| Product images | 2048 x 2048 | 300KB |
| Hero Image | 1280 x 720 | 10 MB |
| Blog Image | 1200 x 800 | 3 MB |
| Logo Image | 100 x 100 | 1 MB |
For additional recommendations by image type, refer to Shopify’s image size guide.
As Shopify features a Content Delivery Network (CDN), properly sized and optimized images load faster worldwide. ImageOptimizerPro complements this by automatically syncing optimized versions with Shopify’s CDN for consistent performance.
3. Choose the Right File Format
Selecting the right file format plays a huge role in performance and quality balance. Shopify does support JPEG, PNG, GIF, SVG, and WebP, but not all are equal.
- JPEG (JPG): Best for photos, product images, and backgrounds. It balances compression and color accuracy.
- PNG: Great for transparent images, icons, or graphics requiring sharp edges.
- GIF: Utilize minimally, only to do simple animations.
- SVG: Scalable graphics (like logos) that stay crisp on all screen sizes.
- WebP: The most efficient modern format, reducing size by up to 30% smaller than JPEG or PNG without quality loss.
Shopify automatically serves WebP when possible, but your original uploads must still be in optimized formats. Image Optimizer Pro automatically converts all your existing images into WebP formats, so that every visitor receives the fastest-loading format possible.
4. Use Descriptive Image Names and Alt Text
Shopify image optimization contributes to SEO, too. Search engines read the filenames and alt texts in order to figure out what each image represents. This helps your visuals appear in Google Image Search and improves accessibility for screen readers.
File names: Avoid generic names like IMG_2345.jpg. Instead, use descriptive, keyword-rich labels like organic-cotton-tshirt-blue.jpg.
Alt text: This is the short description shown if an image fails to load. It also enhances the aspect of accessibility and helps Google associate visuals with your content.
Instead of “product image,” write: “Blue organic cotton T-shirt for men.”
5. Ensure Your Images are Responsive
Whatever your online store offers, a good portion of your visitors will browse on their phones or tablets. As Google now focuses on mobile-first indexing, offering a smooth mobile experience is crucial, and that aspect begins with responsive images.
Responsive images automatically adjust to various screen sizes so that your site looks crisp and loads efficiently on any device. This can be done most easily with a modern and mobile-friendly Shopify theme. These themes are configured to support image responsiveness for you, generating the right HTML code to ensure browsers can display the best picture size for Shopify across all devices.
6. Create Image Sitemaps
This step is worth keeping an eye on if your site has a large number of carousels, image pop-ups, or galleries. While these visuals improve the user experience, they can sometimes go unnoticed by Google’s crawlers, meaning those images might not help your SEO as much as they could.
The easiest way is to create a dedicated image sitemap. It informs Google of precisely what is on your site and ensures that every element on the site, including images, are properly indexed. This helps your visual content contribute to your overall SEO performance.
Shopify automatically generates a sitemap.xml file for every store, but you can go a step further by creating an image-specific sitemap. There’s an official guide by Google that takes one through the process. When building yours, do not forget to add descriptive tags in your HTML to make it more visible.
Once your sitemap is ready, you need to submit it through Google Search Console:
- Log in (or sign up) and verify your website ownership.
- On the left-hand menu, click on “Sitemaps”.
- Enter the URL of your image sitemap and click Submit.

That’s it. This little trick ensures all your images are recognized by Google and your visual content works harder for your SEO.
7. Conduct Regular Image Audits
When testing, consider the impact on the page load speed and conversions due to image changes. Improving one can sometimes hurt the other. As an example, by compressing images, you can make your site faster, but lowering visual attractiveness, which could affect sales. The solution lies in balancing the two: use enough quality images to capture the attention of shoppers, but keep the pages light and fast.
Before you start, define your priorities.
Ask yourself:
- Is it more important to have a faster page load speed and improved search performance?
- Or do you value higher conversion rates on your website the most?
Once you know your goals, you can test the right elements and measure the impact of your changes.
Testing for SEO
It’s impossible to measure the impact of image SEO on the overall rankings, but you can ensure you’re following best practices:
- Check that all images include descriptive alt tags.
- Monitor the performance of optimized image URLs.
- Use the best image optimization tool for Shopify, like Image Optimizer Pro, to confirm all images are properly tagged.
These steps ensure good SEO foundations even when it takes time to reflect in search rankings.
Testing for Page Speed
This part is straightforward. Use Google PageSpeed Insights to test your page before and after optimizing images. The report will show how quickly your site loads.
In order to optimize your page load time, you can use a tool like Website Speedy for additional optimization support.
Testing for Conversions
Conversion testing depends on your business goals and analytics tools. Define, first, what conversion means to you. It could be:
- Email or notification sign-ups
- Items added to a cart
- Completed purchases
Use Google Analytics for numerical data and Hotjar to understand user behavior. Whichever metric you choose, be consistent in all your testing in a bid to measure the results accurately.
Advanced Shopify Image Optimization Tips
If you’ve already covered the basic steps for image optimization, here are a few more details and some advanced tips and tricks that are more than just useful to your store.
1. Optimize Your Thumbnails
For thumbnails, you should consider small file sizes over perfect image quality. These images appear small, so a slight compromise in quality won’t hurt. Also, write unique alt text for each thumbnail rather than duplicating the alt text from your main product images.
2. Enable Lazy Loading
Lazy loading enhances the speed of the page since it loads only the images when they come into view. This means faster initial load times for your visitors. This can be easily enabled with the help of Website Speedy, which provides a single-click lazy loading setup.
3. Use Decorative Images Poorly
Decorative images can make your site more visually appealing, and too many may slow it down. Keep them simple and make sure that all the images have a purpose, whether it’s to inform, guide, or inspire shoppers.
4. Avoid GIFs for Product Images
GIFs can appear appealing, but their large file sizes make them a poor choice for product pages. Reducing their size can harm the quality of images, so instead use static photos or videos that aren’t heavy.
5. Add Captions to Images
Although these are optional, captions can help Google to have a better insight into your content and improve your SEO. Use clear, descriptive captions that reinforce what your image is about.
Final Thoughts
Shopify offers a good starting point when it comes to managing the visuals of your store, but using only the default option will not allow you to gain performance benefits. By following the above Shopify image optimization tips, you will be sure that your images are serving justice to every aspect of your website, including page load time, to engagement and conversions.
FAQs
Q1. What is the best image size for Shopify products?
Q2. Does Shopify automatically optimize images?
Q3. How do I compress images on Shopify without losing quality?
Q4. How can I improve Shopify LCP (Largest Contentful Paint)?
Q5. What image format is best for Shopify?
21 November, 2025
Leave a CommentIshan Makkar
He is a web performance specialist with hands-on experience optimizing websites for speed, media efficiency, and user engagement. As the founder of Website Speedy and Image Optimizer Pro, he has helped businesses across multiple industries improve load times, strengthen SEO, and reduce bounce rates. His work focuses on creating reliable, data-driven optimization solutions that deliver measurable results and build long-term digital trust.