
TL;DR: Large, unoptimized images can make your Wix website slow, hurting user experience and SEO. The fix? Resize and compress images before uploading, use WebP format, and optimize for mobile. Tools like Image Optimizer Pro help automate Wix image compression and keep visuals sharp while reducing file size.
You’ve spent hours building a beautiful Wix website, carefully selecting the right fonts, arranging every section perfectly, and adding high-quality images to showcase your brand. But even with all that effort, visitors leave before your homepage even finishes loading. It’s frustrating, right? The real problem usually isn’t your design rather it’s the large image files. Just one big, high-resolution image can slow your site down, leaving users staring at a blank screen and causing you to lose traffic, engagement, and potential customers before they even see what you have to offer.
Wix image optimization is the key to fixing this issue. By resizing smartly, choosing the right formats, and applying targeted compression, you can reduce file sizes without compromising visual quality. The result? Your pages load smoothly on both smartphones and desktops, your SEO improves, and visitors stick around long enough to explore your content or make a purchase.
Here’s how you can reduce image file sizes while keeping your site looking sharp and professional.
The Real Impact of Image Optimization on Your Wix Website
Wix makes it easy to create stunning websites with modern templates and drag-and-drop simplicity. But behind the scenes, large image files can quietly drag down your site’s performance. Slow-loading pages frustrate visitors, reduce conversions, and even hurt your search rankings.
Optimizing Images Offers Major Benefits:
- Faster Load Times: Visitors stay engaged longer when pages load instantly.
- Better Mobile Experience: Smaller, responsive images allow smooth scrolling on mobile devices.
- Improve SEO: Google favors mobile performance and speed.
- Crisp, Clear Visuals: Clean, crisp images even at lighter file sizes.
To put it briefly, lighter images enable your Wix site to seem faster, better, and more professional.
How Wix Manages Image Optimization
Many Wix users don’t realize that Wix already does some image optimization behind the scenes. When you upload an image, Wix may automatically compress it and convert it to WebP format, depending on the original file type and the visitor’s browser.
That’s helpful, but it’s not always enough. If you’re uploading large, high-resolution photos, like 5MB images straight from your DSLR or smartphone, Wix’s built-in optimization might not fully reduce the file size. These heavy files can still slow down your site, especially on mobile networks.
The golden rule: Keep your images light before uploading. A good target is usually under 200KB, though the ideal size depends on the type of image and where it appears on your site.
By preparing your images correctly, you make sure Wix’s system can do its job efficiently. Your pages load faster, visitors stay longer, and your SEO gets a boost.
Wix Image Optimization Tips to Boost Your Store Performance
Below are some of the practical ways to help you optimize your images and keep your Wix site running smoothly.
1. Resize Before You Upload
Consider resizing as the initial move towards Wix image size optimization.
You don’t need to upload a 4000-pixel-wide image if your page layout only displays it at 1200 pixels. Oversized files waste bandwidth without improving appearance.
Here’s a simple guideline for common Wix image types:
| Image Type | Recommended Dimensions (px) |
|---|---|
| Full-width banners | 2000-2500px |
| Gallery or product images | 1200-2500px |
| Thumbnails | 400-600px |
| Logos/icons | SVG format |
By resizing images to these dimensions before uploading, you will instantly improve your Wix image loading speed.
2. Compress Images
Wix image compression reduces file sizes while keeping your images clear and sharp.
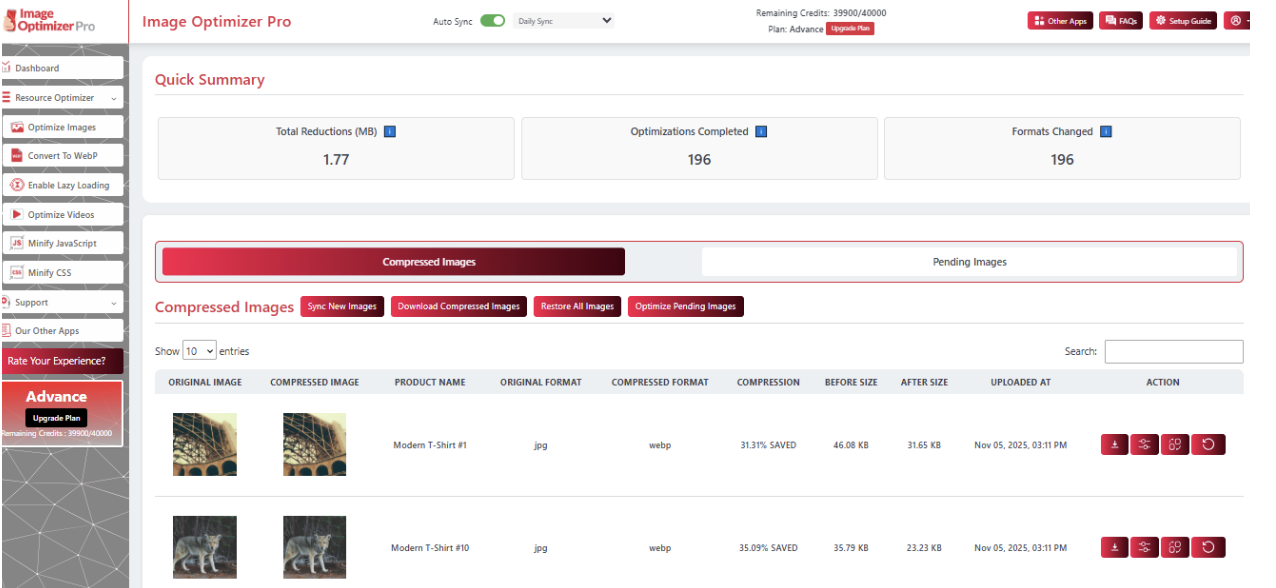
This can be done manually or automatically, but automated options are much faster. Using a Wix image optimizer, you can reduce file sizes by up to 70% without any noticeable loss in quality.
Option 1: Automatic Compression
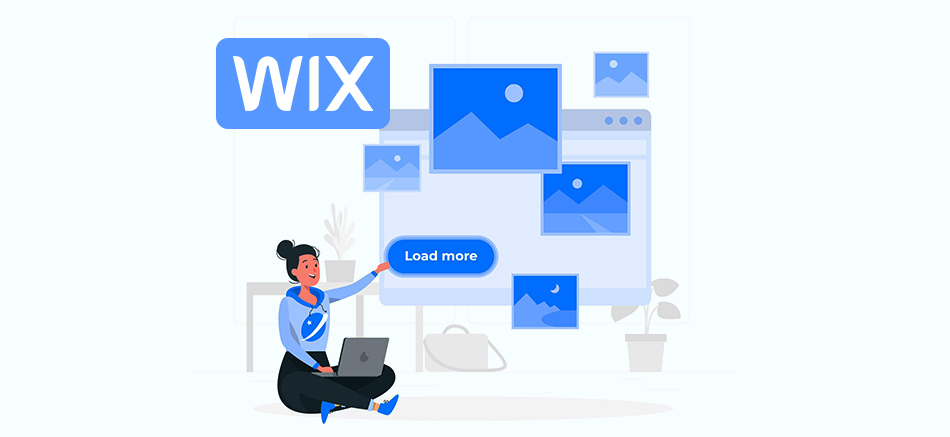
Install the Image Optimizer Pro Wix app, click on the “Optimize Images” section, and run the optimization. The app automatically compresses your files in the background, optimizing them for both desktop and mobile versions.
Option 2: Manual Compression
For more control, Image Optimizer Pro also allows manual compression. This hands-on approach lets you fine-tune each image before it goes live.
To reduce Wix image sizes without losing quality, focus on two key factors: compression quality and image format. Resize images to their maximum display size, then compress just enough to remove unnecessary data.
You can preview how much the file size will be reduced before finalizing the compression. This ensures no guesswork and no risk of pixelation.

3. Pick the Best Image Format
Selecting the best image format for Wix websites depends on the type of content you’re presenting. Each format serves a different purpose:
| Format | Ideal Use |
|---|---|
| JPEG (JPG) | Photos, lifestyle images |
| PNG | Transparent backgrounds, icons |
| WebP | Most general use |
| GIF | Simple animations |
| SVG | Logos, icons |
Use WebP as often as you can. Wix supports it automatically and provides the best quality/compression ratio.
4. Optimize Wix Images for Mobile
Over 64% of web traffic now comes from mobile devices. So, consider optimizing Wix images for mobile to have quick functionality overall.
Wix automatically creates responsive layouts, but it doesn’t always choose the smallest image on mobile devices. Image sizes can be manually resized in the mobile editor or use adaptive layouts to serve different resolutions based on screen size.
Also, check how your pages load on a real phone (not only Wix preview). A 4G connection will let you know whether your images are indeed mobile-friendly.
5. Clean File Names and SEO-Friendly Alt Text
Image optimization doesn’t only mean speed but also search visibility. Google indexes images based on filenames and alt text, so poor naming results in missed SEO opportunities.
Use descriptive, relevant filenames like:
- handcrafted-oak-table.jpg
- modern-office-chair.png
Avoid defaults like IMG_234.jpg.
Next, fill in the alt text section in your Wix Media Manager. It helps screen readers to describe the image for accessibility and provides Google with more context to rank your visuals.
Keep it natural and keyword conscious (e.g., “modern oak dining table with black legs”).
6. Caching and Lazy Loading
Wix also supports lazy loading, which delays off-screen images from loading until the user scrolls to them. It’s as if you give your page a head start, only visible images load first, cutting down on initial load time.
Wix automatically applies lazy loading to most image elements. Combine this with browser caching, enabling returning visitors to access stored image files quickly. Thus, your Wix site will feel noticeably snappier.
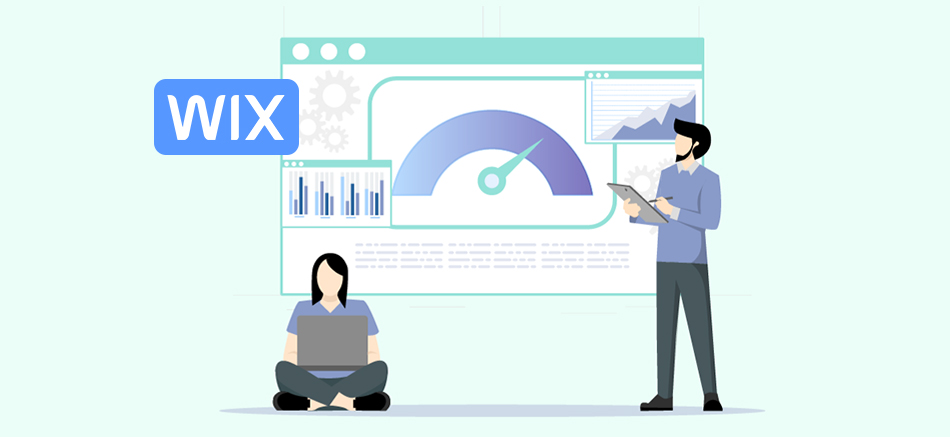
7. Testing and Measuring Results
After all your optimization efforts, test your site’s speed. Tools such as Google PageSpeed Insights, GTmetrix reveal if your images are contributing to or hurting performance.
Look for these key metrics:
- Largest Contentful Paint (LCP): How long does your biggest image take to load.
- Total Blocking Time (TBT): Whether images delay other page elements.
- Cumulative Layout Shift (CLS): How much content jumps around as images load.
In case the scores remain too low, think of adjusting compression settings or further resizing specific images. Still not hitting the mark? A tool like Website Speedy can help you push performance one step further and achieve a faster, more consistent page load time.
8. Keep It Consistent
Wix image optimization isn’t a one-time task. Any time you upload new media, follow the same steps: resize, compress, and double-check dimensions.
If your site is more based on visuals (like product listings, galleries, or blogs), schedule to review it at least monthly to keep it trim and lean. Consistency ensures that your site looks presentable and is performing at its best.
Conclusion
Image optimization may not seem like a big thing, but on Wix, this aspect could turn the experience of your site around. Faster pages mean better engagement, stronger SEO, and happier visitors.
With smart resizing, thoughtful compression, and careful formatting, you can keep your visuals sharp while shedding unnecessary weight.
FAQs
Q1. Does Wix automatically optimize images?
Yes, Wix automatically compresses and converts uploaded images to WebP format when supported. However, this built-in feature isn’t always enough for large, high-resolution files. Manually optimizing before upload ensures the best performance.
Q2. How can I make Wix images load faster?
Resize your images, compress them with a tool like ImageOptimizerPro, enable lazy loading, and use WebP format whenever possible. These steps drastically improve Wix image loading speed across desktop and mobile.
Q3. What image size is best for Wix websites?
For full-width banners, aim for 2000–2500px width. Product or gallery images should be around 1200–1500px, and thumbnails can be 800–1000px. Keep file sizes under 200KB for ideal performance.
Q4. Which image format works best on Wix?
WebP is the best format for most Wix websites, it delivers high quality at a smaller size. JPEGs work well for photos, while PNGs are better for transparent graphics. Use SVG for icons or logos when possible.
18 November, 2025
Leave a CommentIshan Makkar
He is a web performance specialist focused on image optimization and site speed. As the founder of Image Optimizer Pro, he helps businesses reduce image load times and improve Core Web Vitals. His work centers on delivering faster websites, better user experience, and measurable SEO gains without complex development.